Drata integration
Coming soon!
Overview
Integrating with Drata enables you to:
- Automate evidence submission for key technical SOC2 controls to the Drata platform. Learn more in SOC2 by Drata.
Integration steps
- Step 1: Create an API token in your Drata account.
- Step 2: Assign and create secrets and tokens in Jit.
- Step 3: Configure the integration in Jit.
Step 1: Create an API Token in Your Drata Account
-
Log in to https://app.drata.com > Click on your profile name >
Settings. -
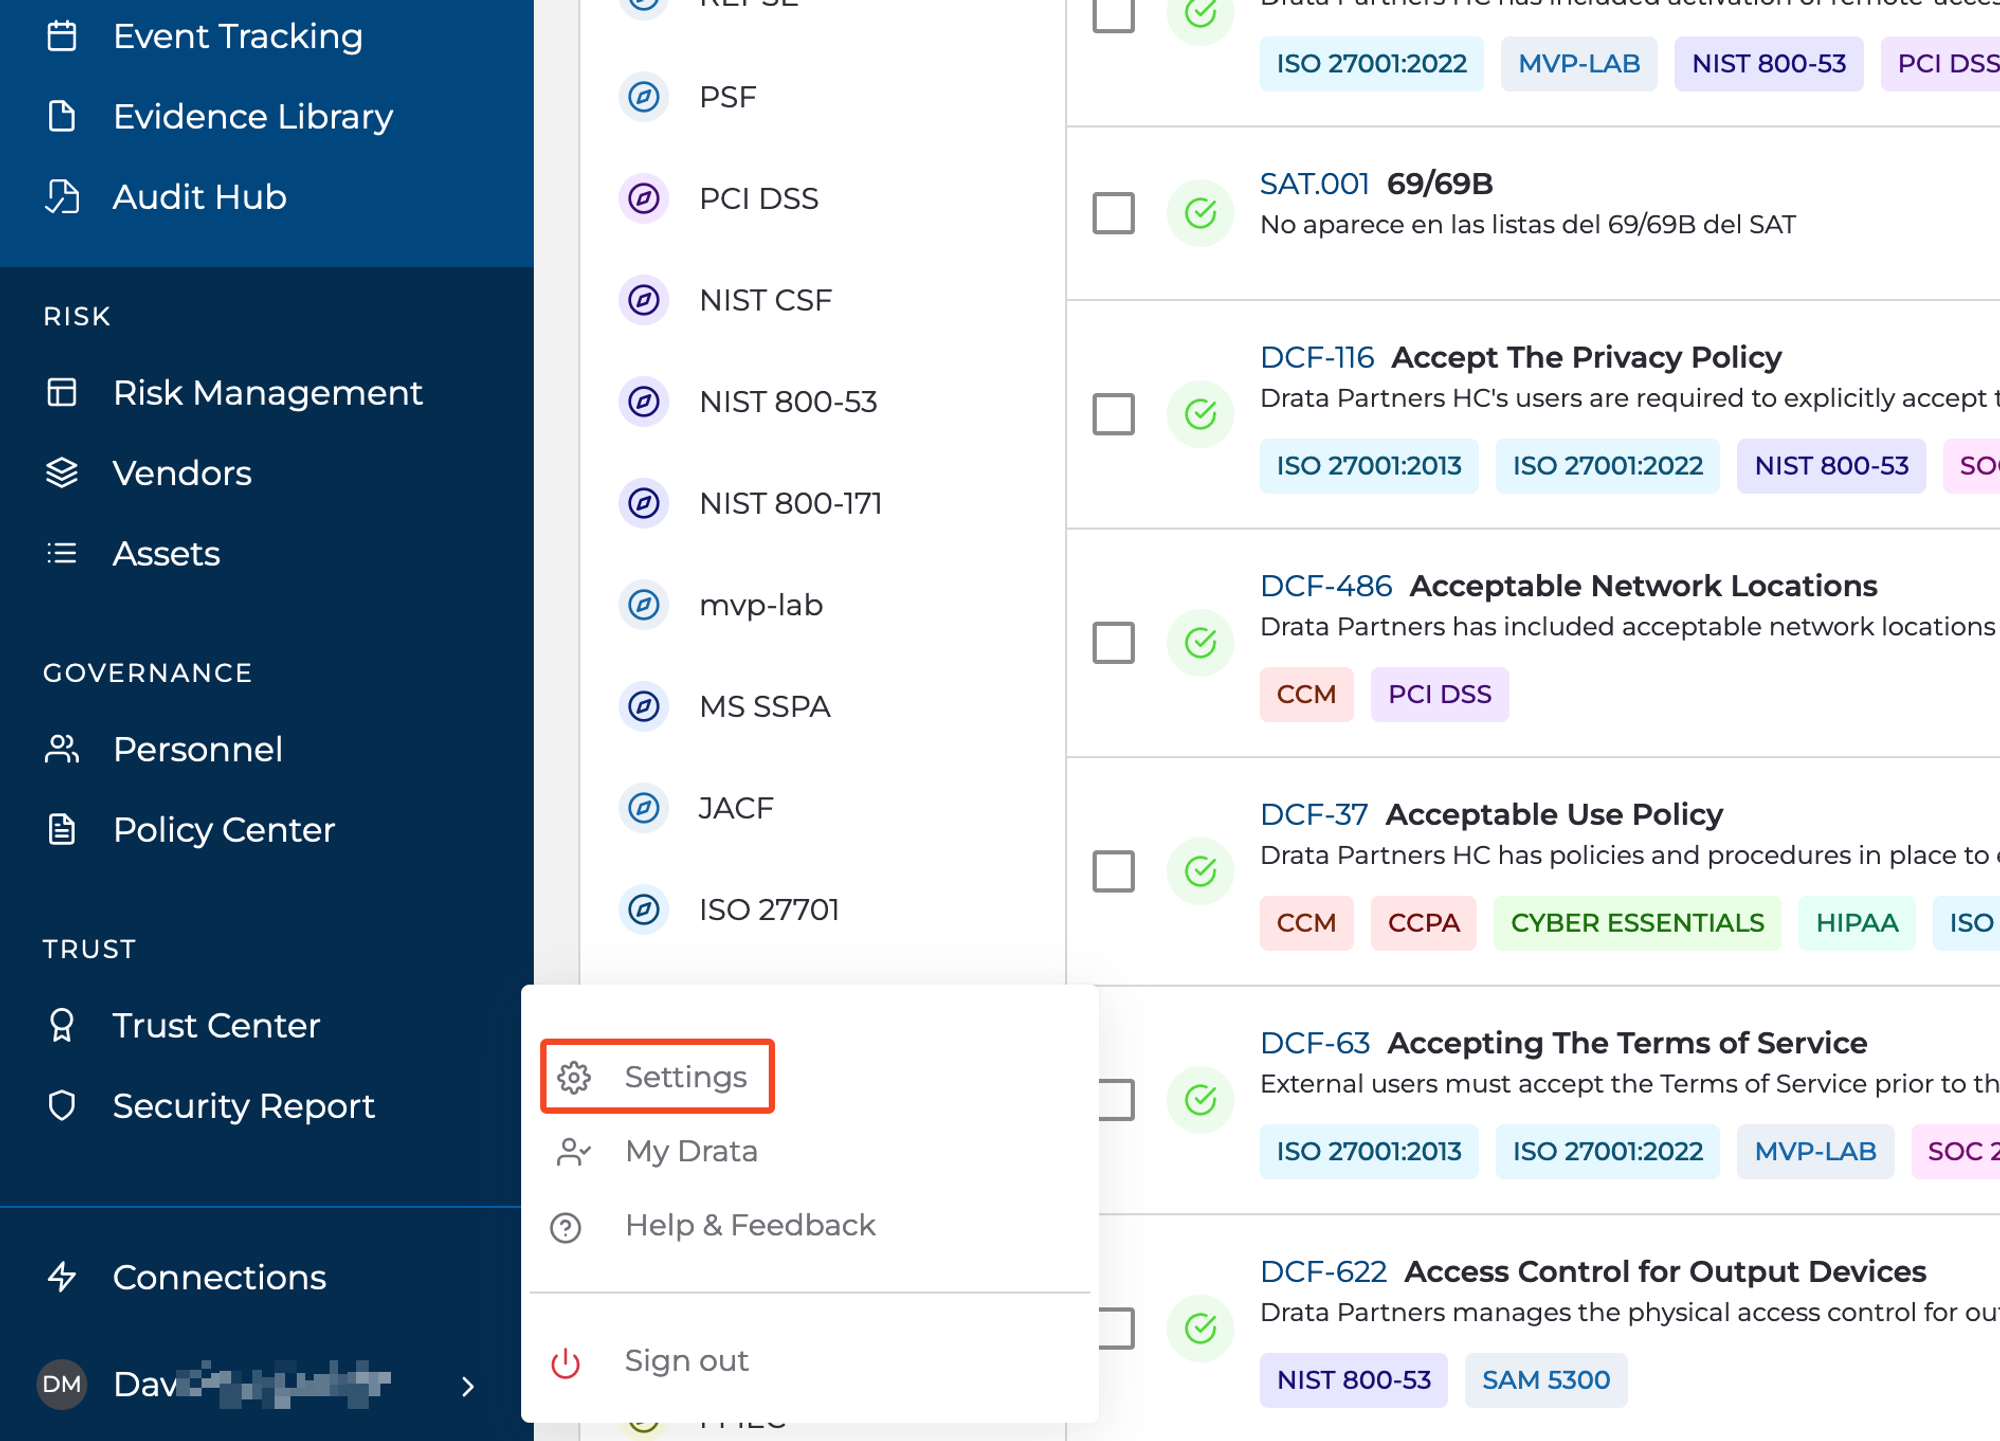
Click
API Keys. -
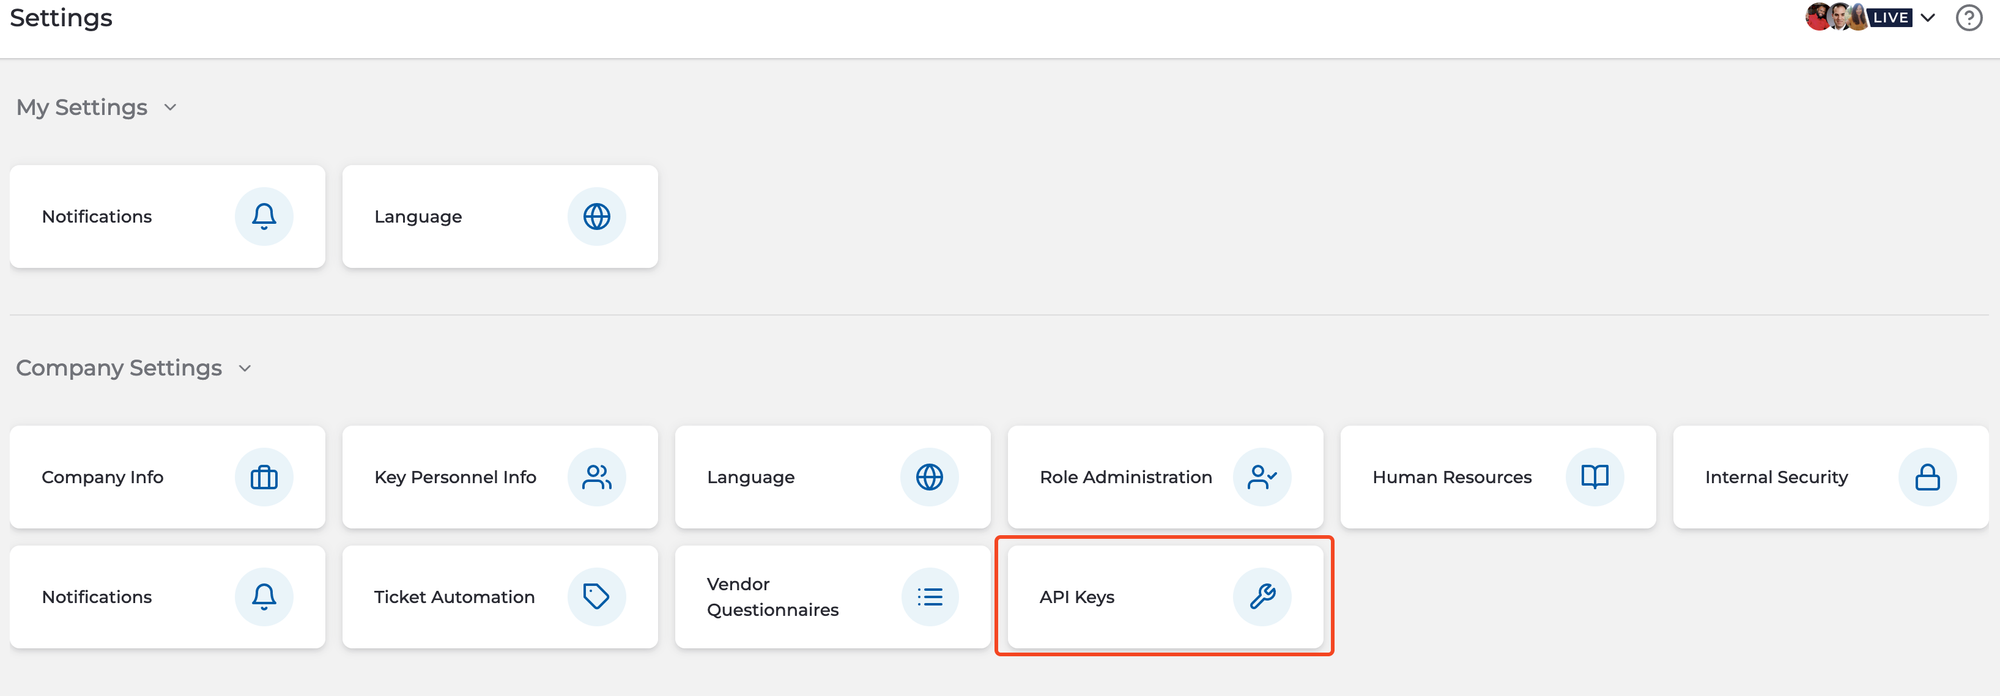
Click
Create API Key. -

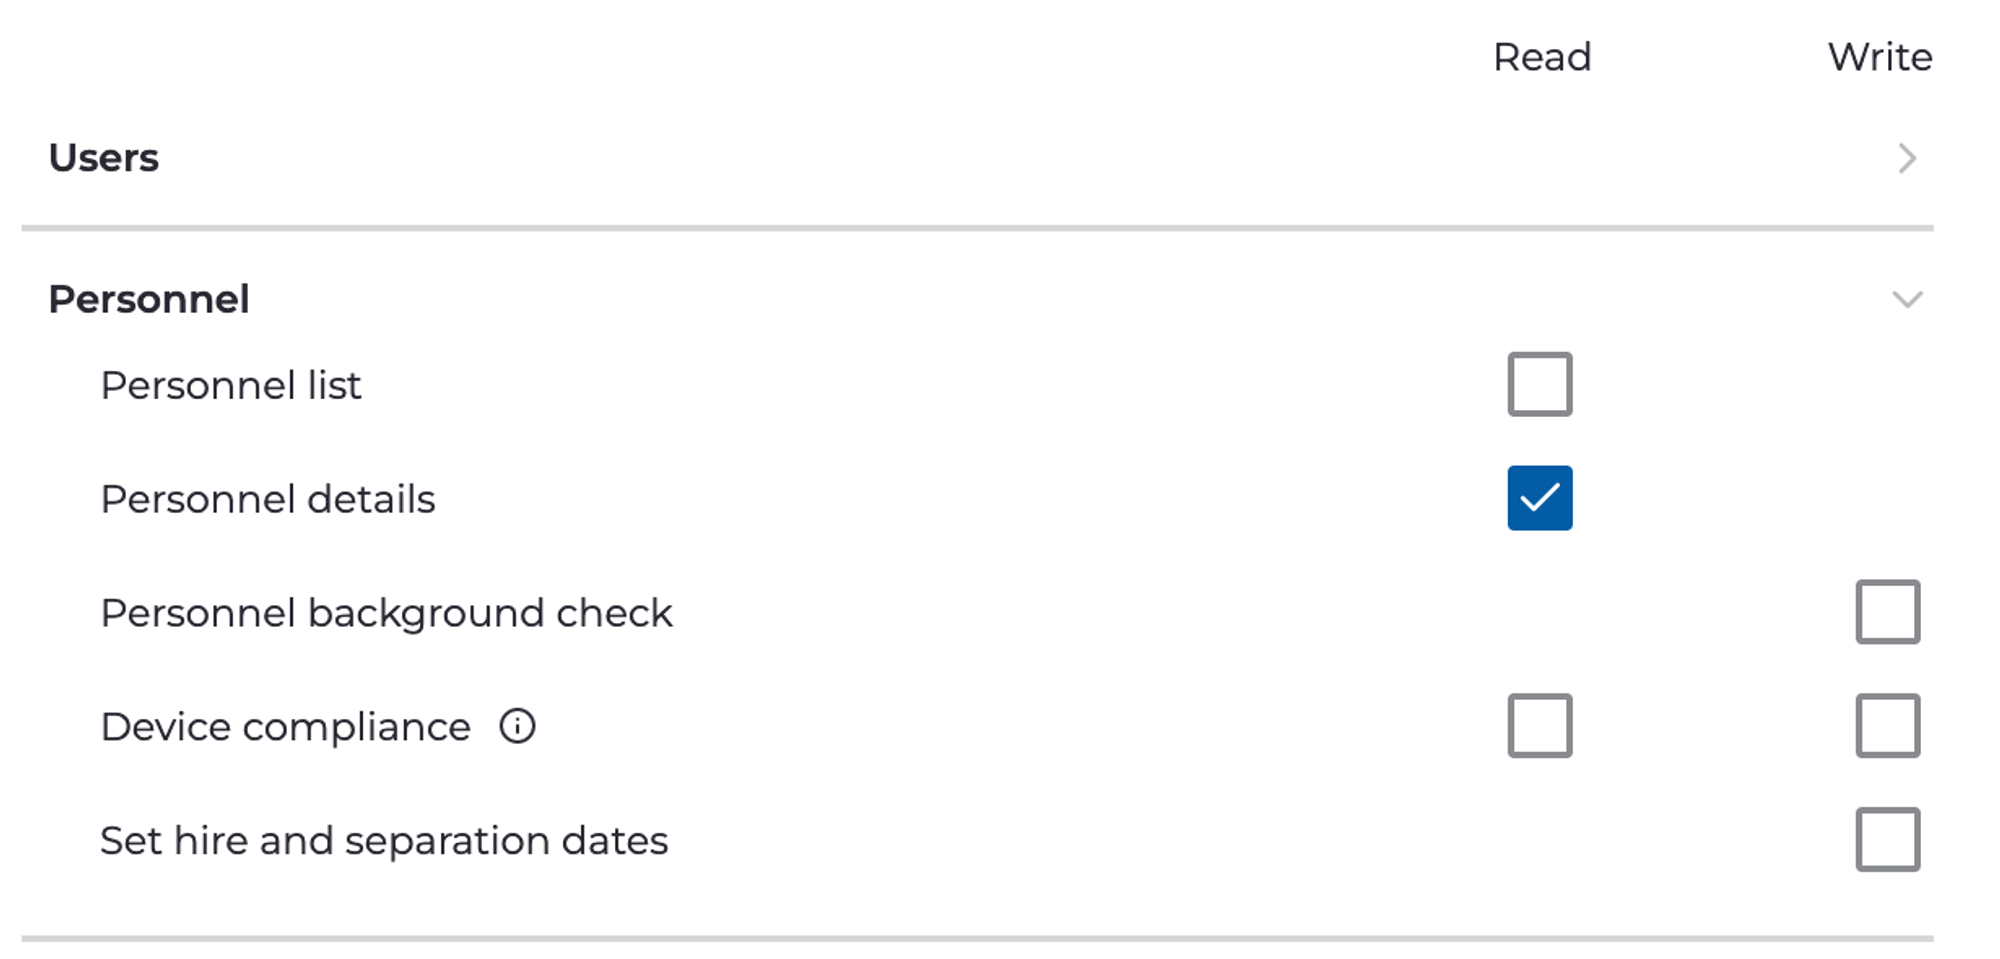
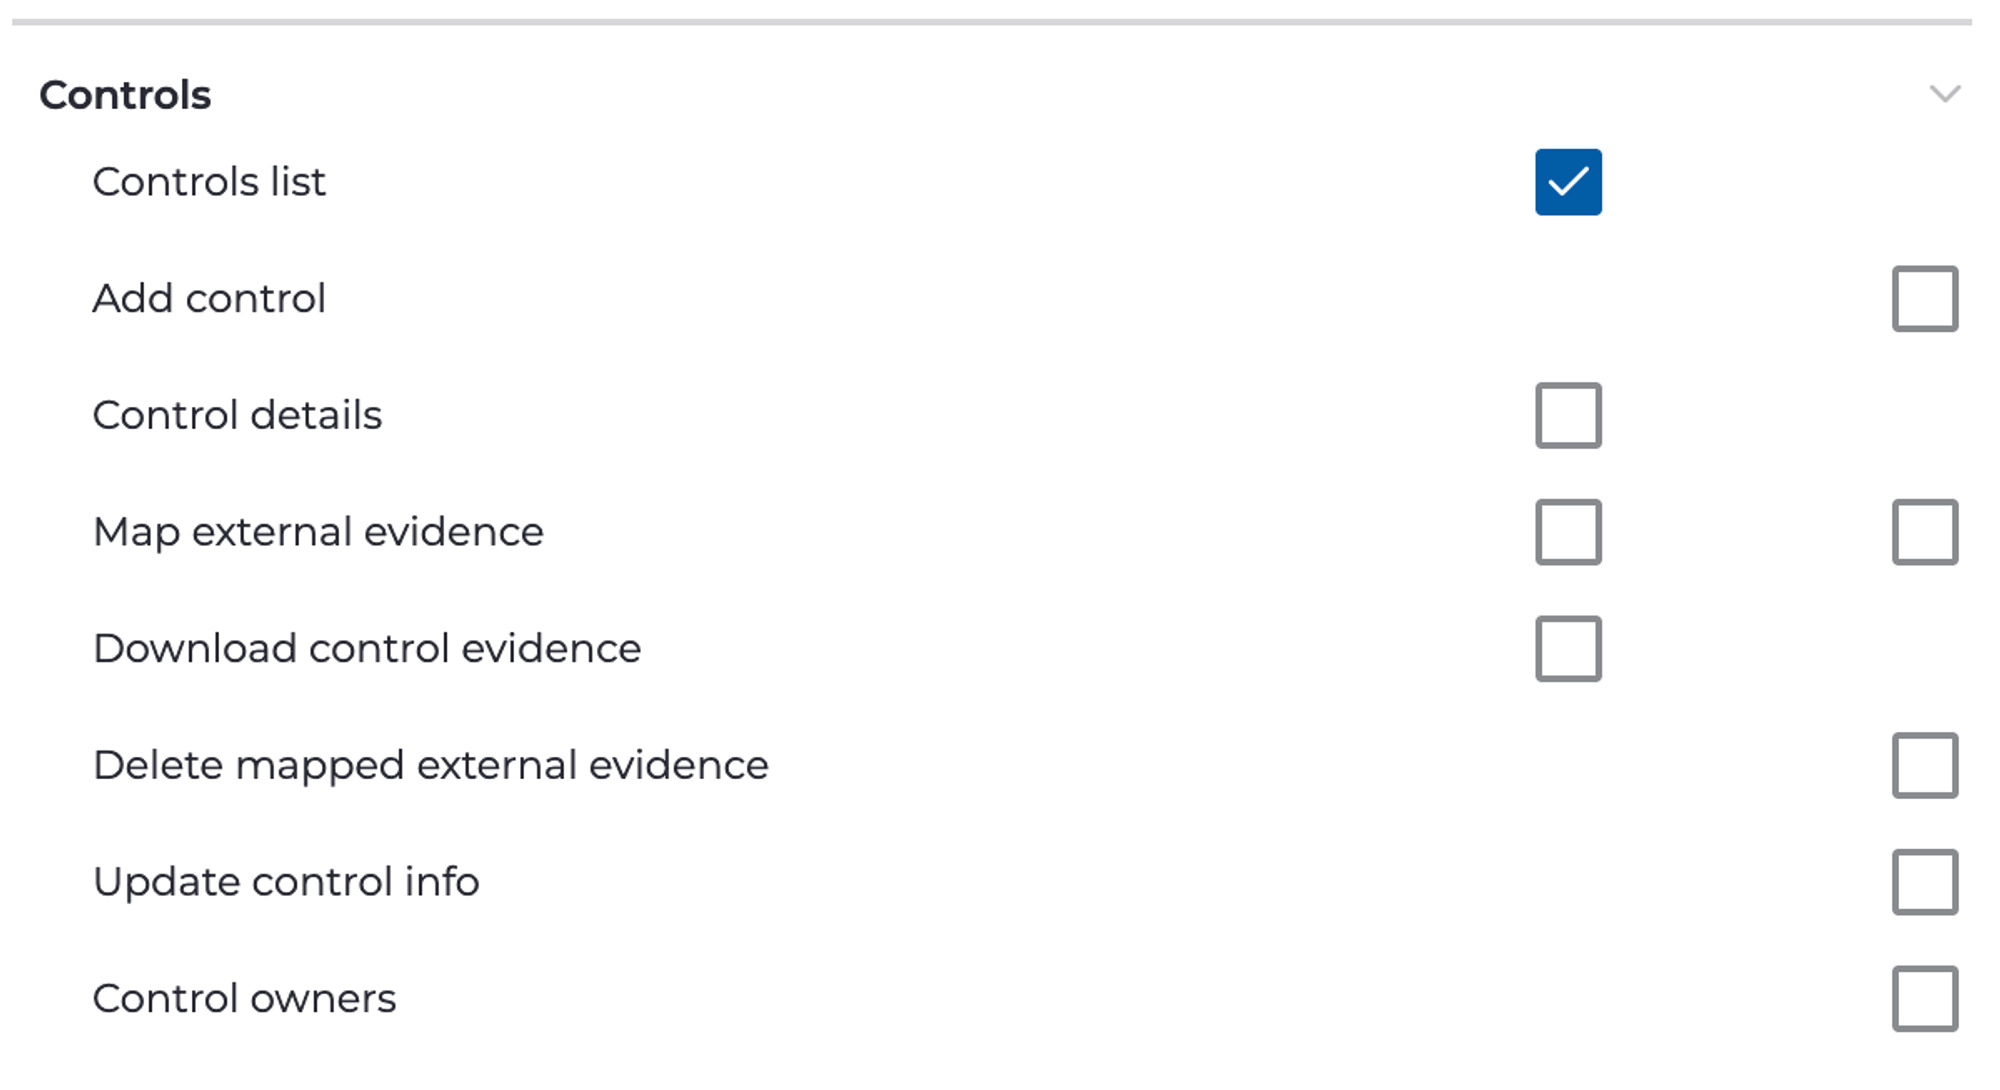
Fill out the Create API Key Form using the guidance below and be sure to save it:
-
- Expiration Date: We recommend a long expiration date so that your integration does not unexpectedly stop working.
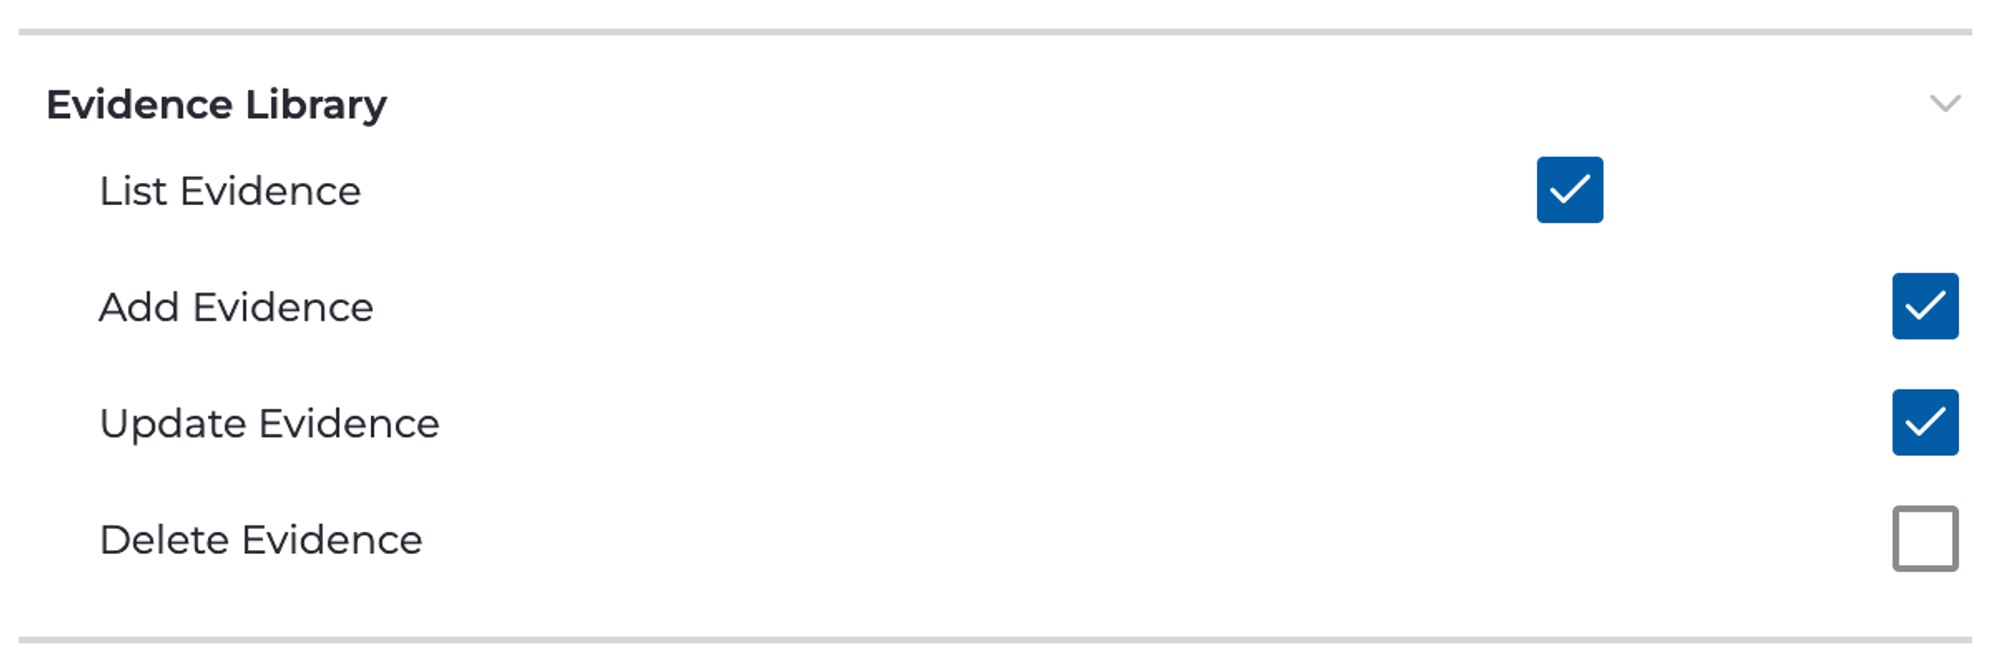
- The following scopes must be enabled:
- Personnel: Personnel details - R
- Controls: Control List - R
- Workspaces: List workspaces - R
- Evidence Library:List Evidence - R,Add Evidence- W, Update Evidence - W, Delete Evidence - W
-

Copy the API Key and save it somewhere secure!
Step 2: Assign and create secrets and tokens in Jit
-
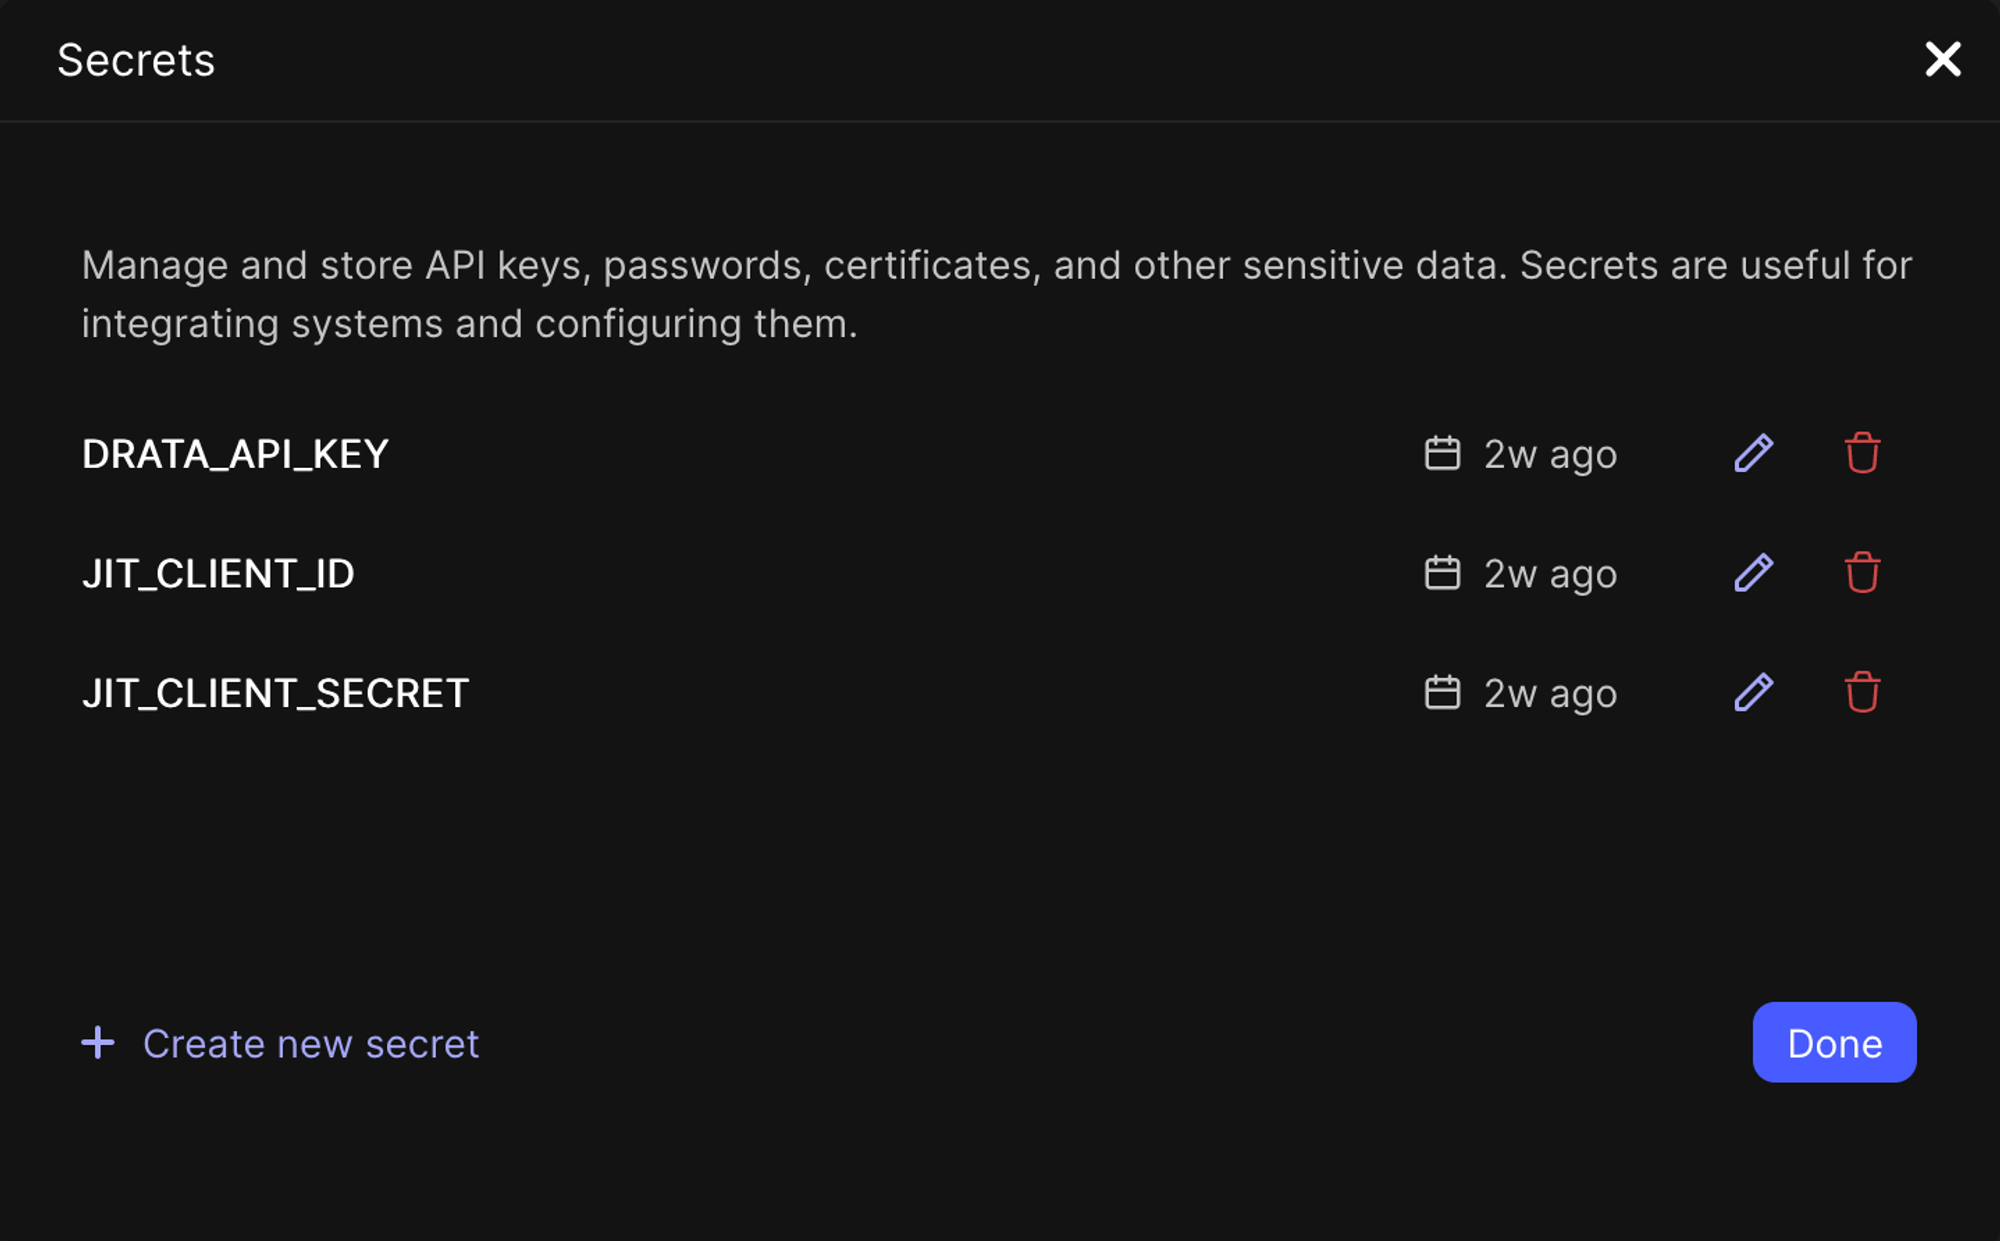
Create a secret for the Drata API key:
- In the Jit platform, go to Settings > Secrets.
- Click on Create new secret, and create a secret named
DRATA_API_KEYand add the Drata API Key you've just created.
-
Create a Jit API Token:
-
Click on Settings > Users & Permissions.
-
Click on API Token > Generate Token.
-

Create a new Key, give it a meaningful description, and select a
developerRole. -
Copy both the
Client IDandSecret Keyto a secret location.
-
-
Store these back to the Jit secrets, go back to Settings > Secrets:
- Click on Create new secret, and create a secret named
JIT_CLIENT_IDand add the JitClient IDyou just created. - Click on Create new secret, and create a secret named
JIT_CLIENT_SECRETand add the JitSecret Keyyou just created.
- Click on Create new secret, and create a secret named
-
Make sure the names are as described for the integration to work properly.
Step 3: Configure the integration in Jit
- In the Jit platform, go to Integrations and locate the Drata tile.
- Click Integrate as-code to open the jit-integration.yml file in your centralized Jit repository.
- Copy and paste the Drata integration-structure at the end of the file.
drata:
  workspace: 'My Drata Workspace'
  user_email: '[email protected]
-
Replace the placeholders with your specific information:
-
user email - should be the mail of the Drata user you generated the Drata API Key for.
-
workspace:
-
Go back to Drata and click on Settings/
-
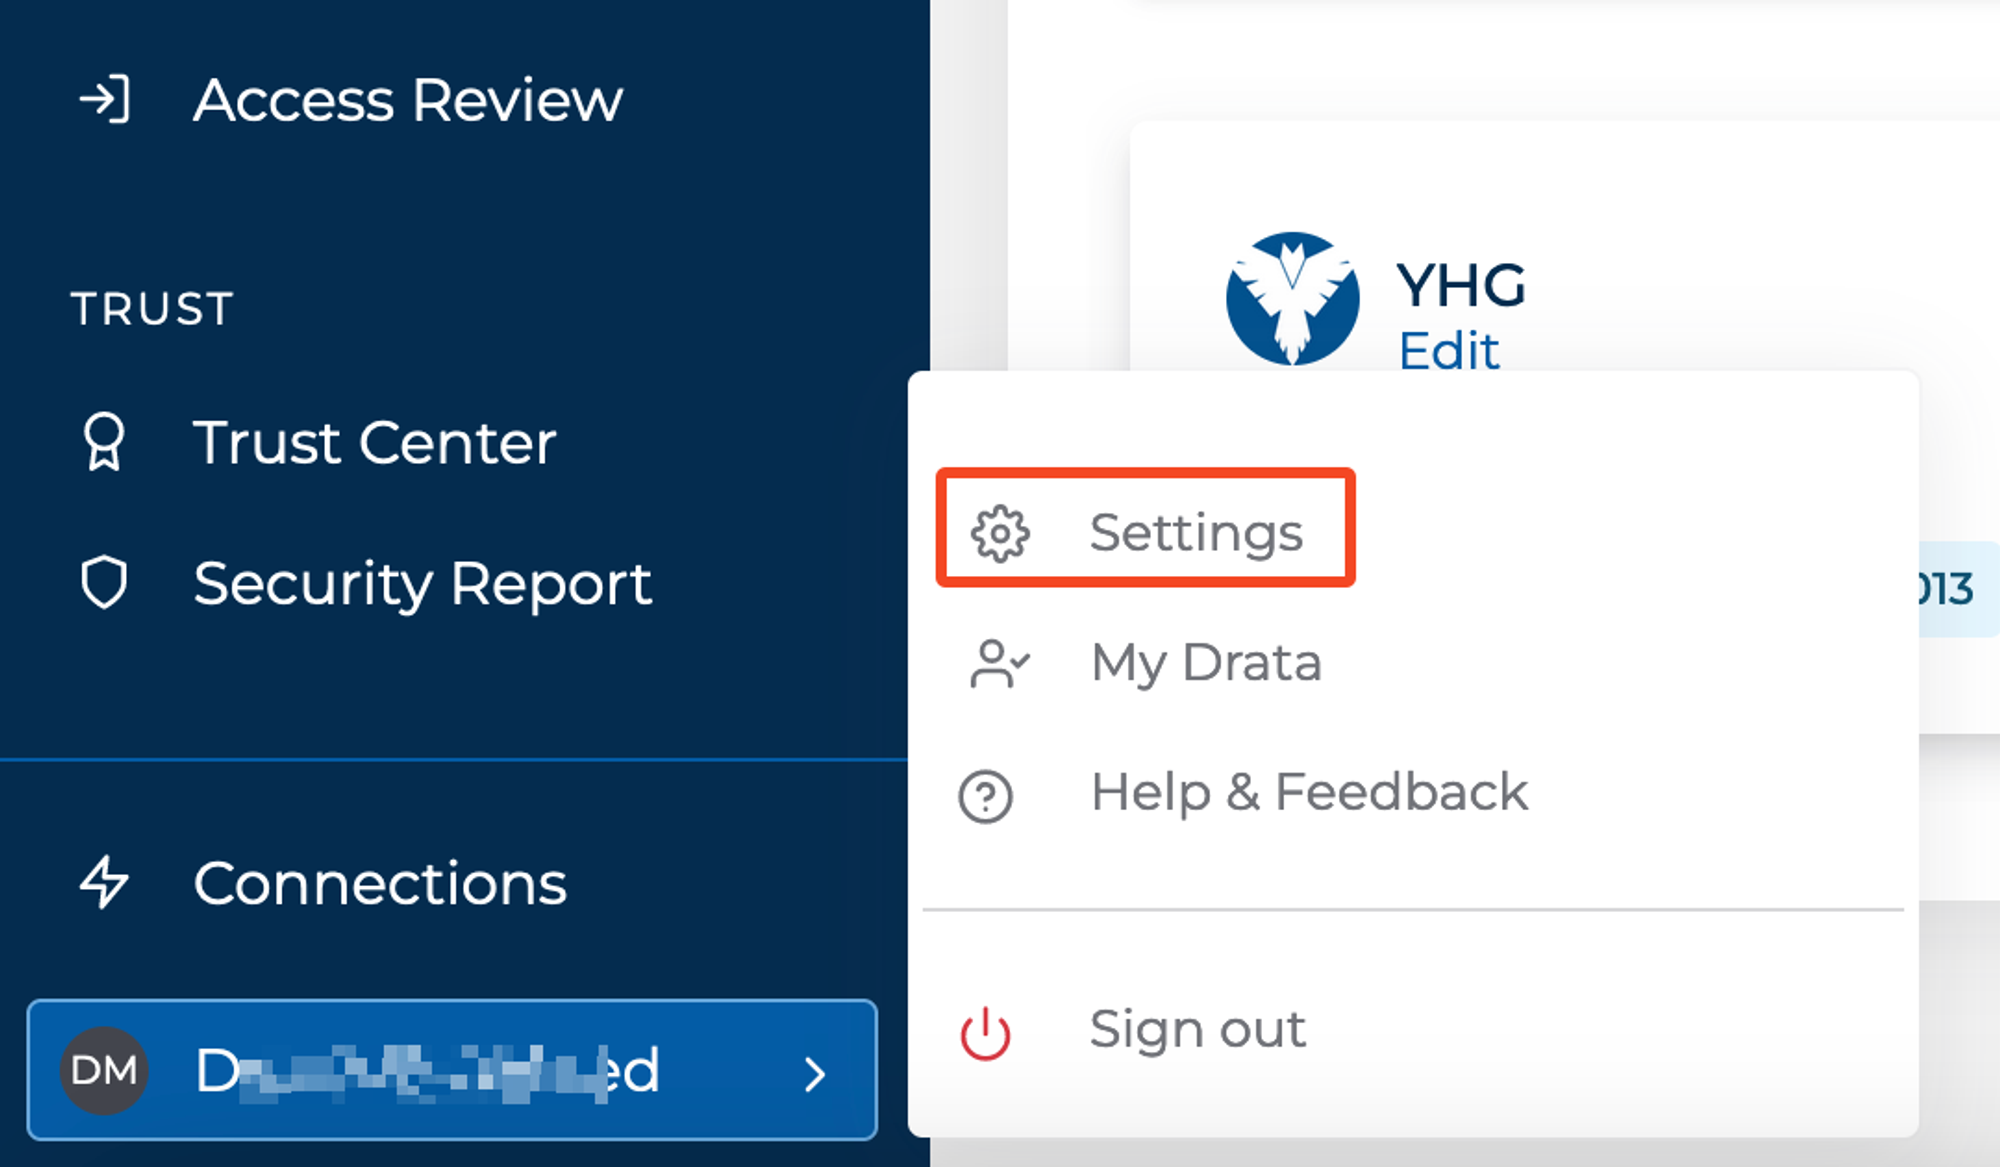
Click Company Info.
-
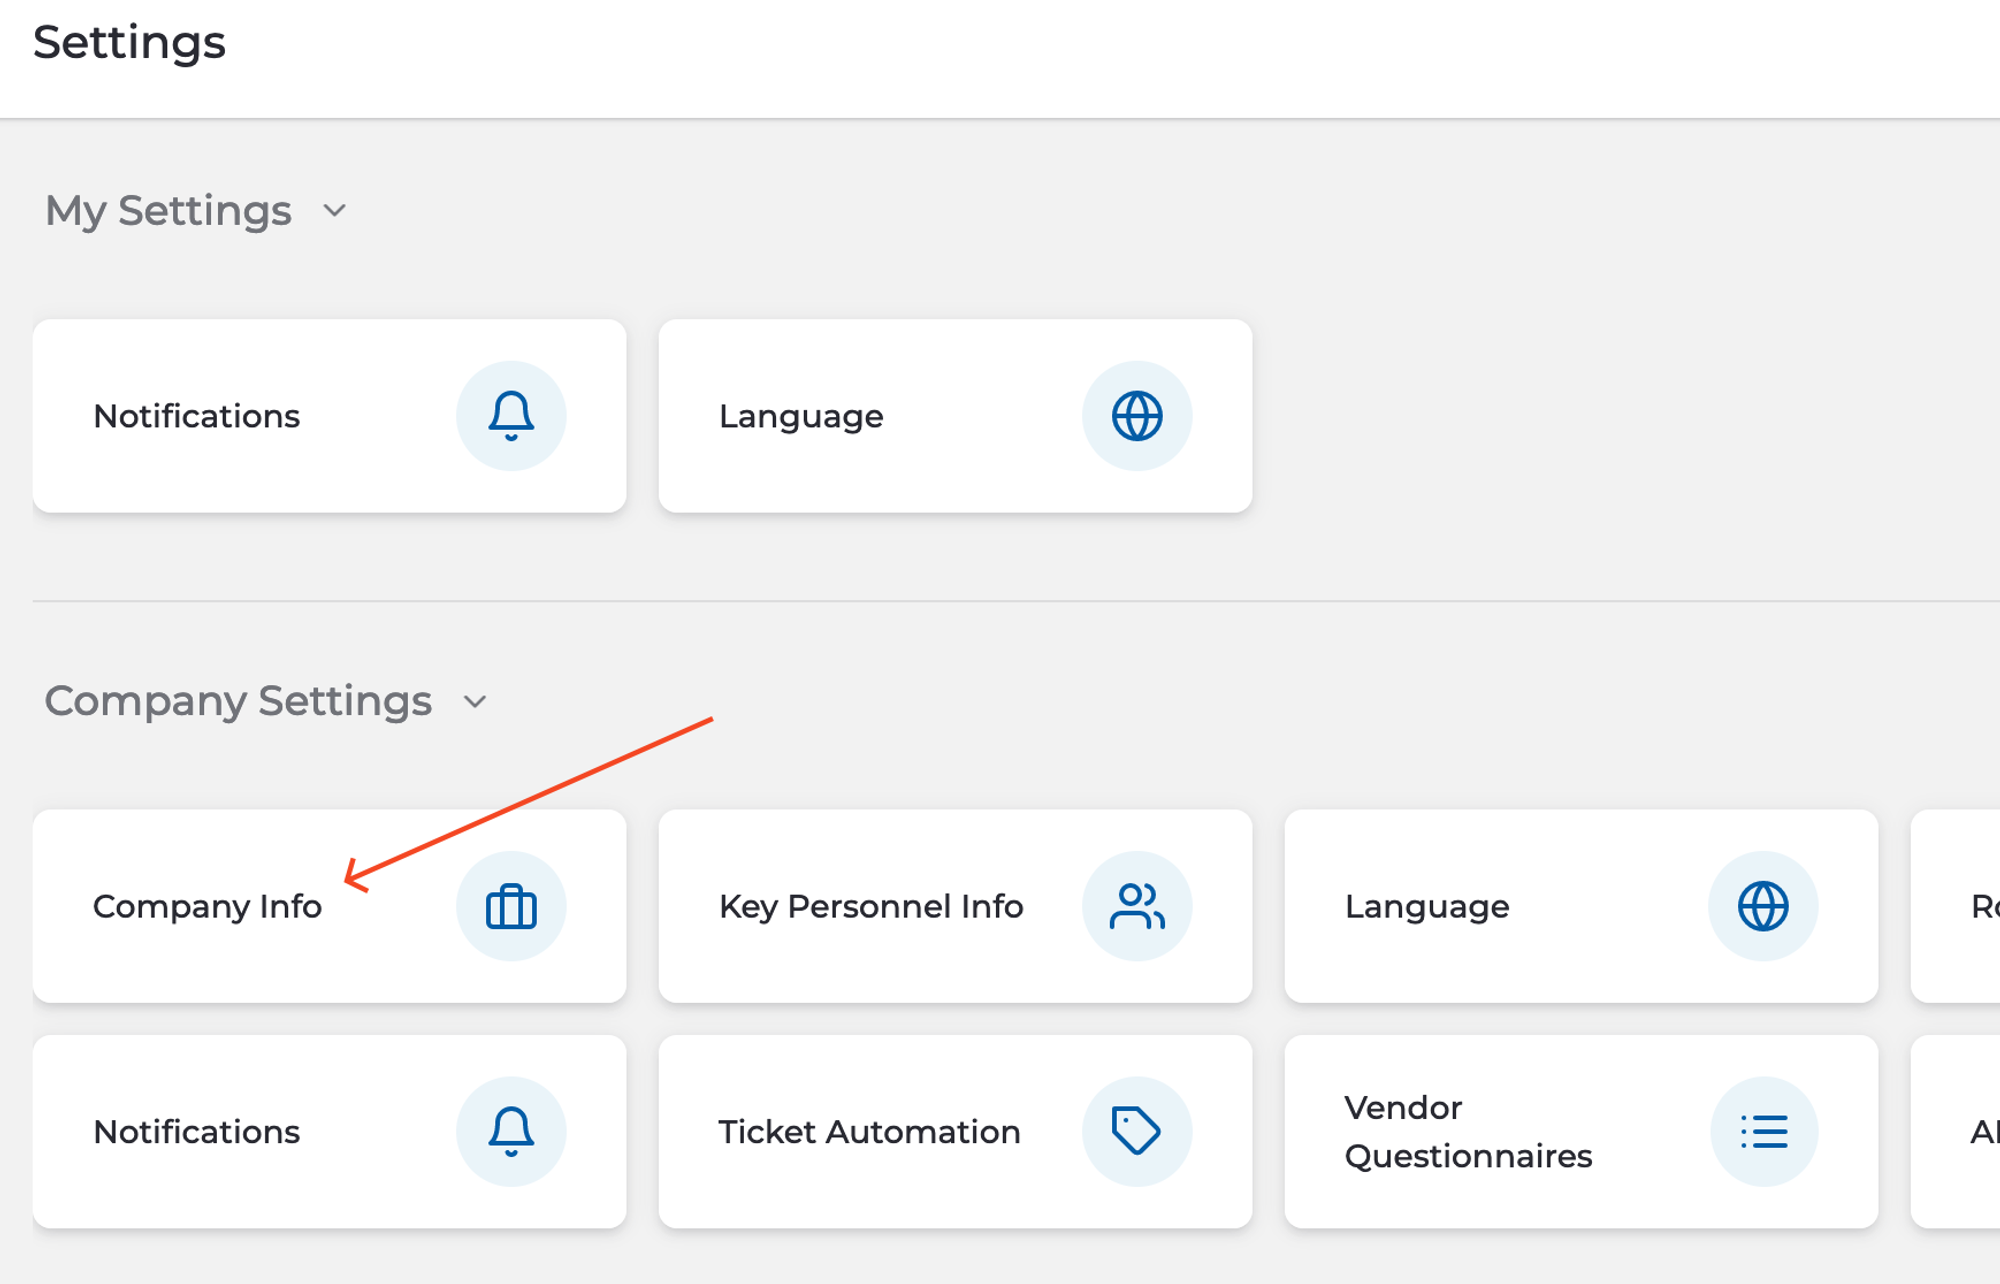
If you don’t have workspace enabled - It will be your Tenant's name. Copy the
Common name. -
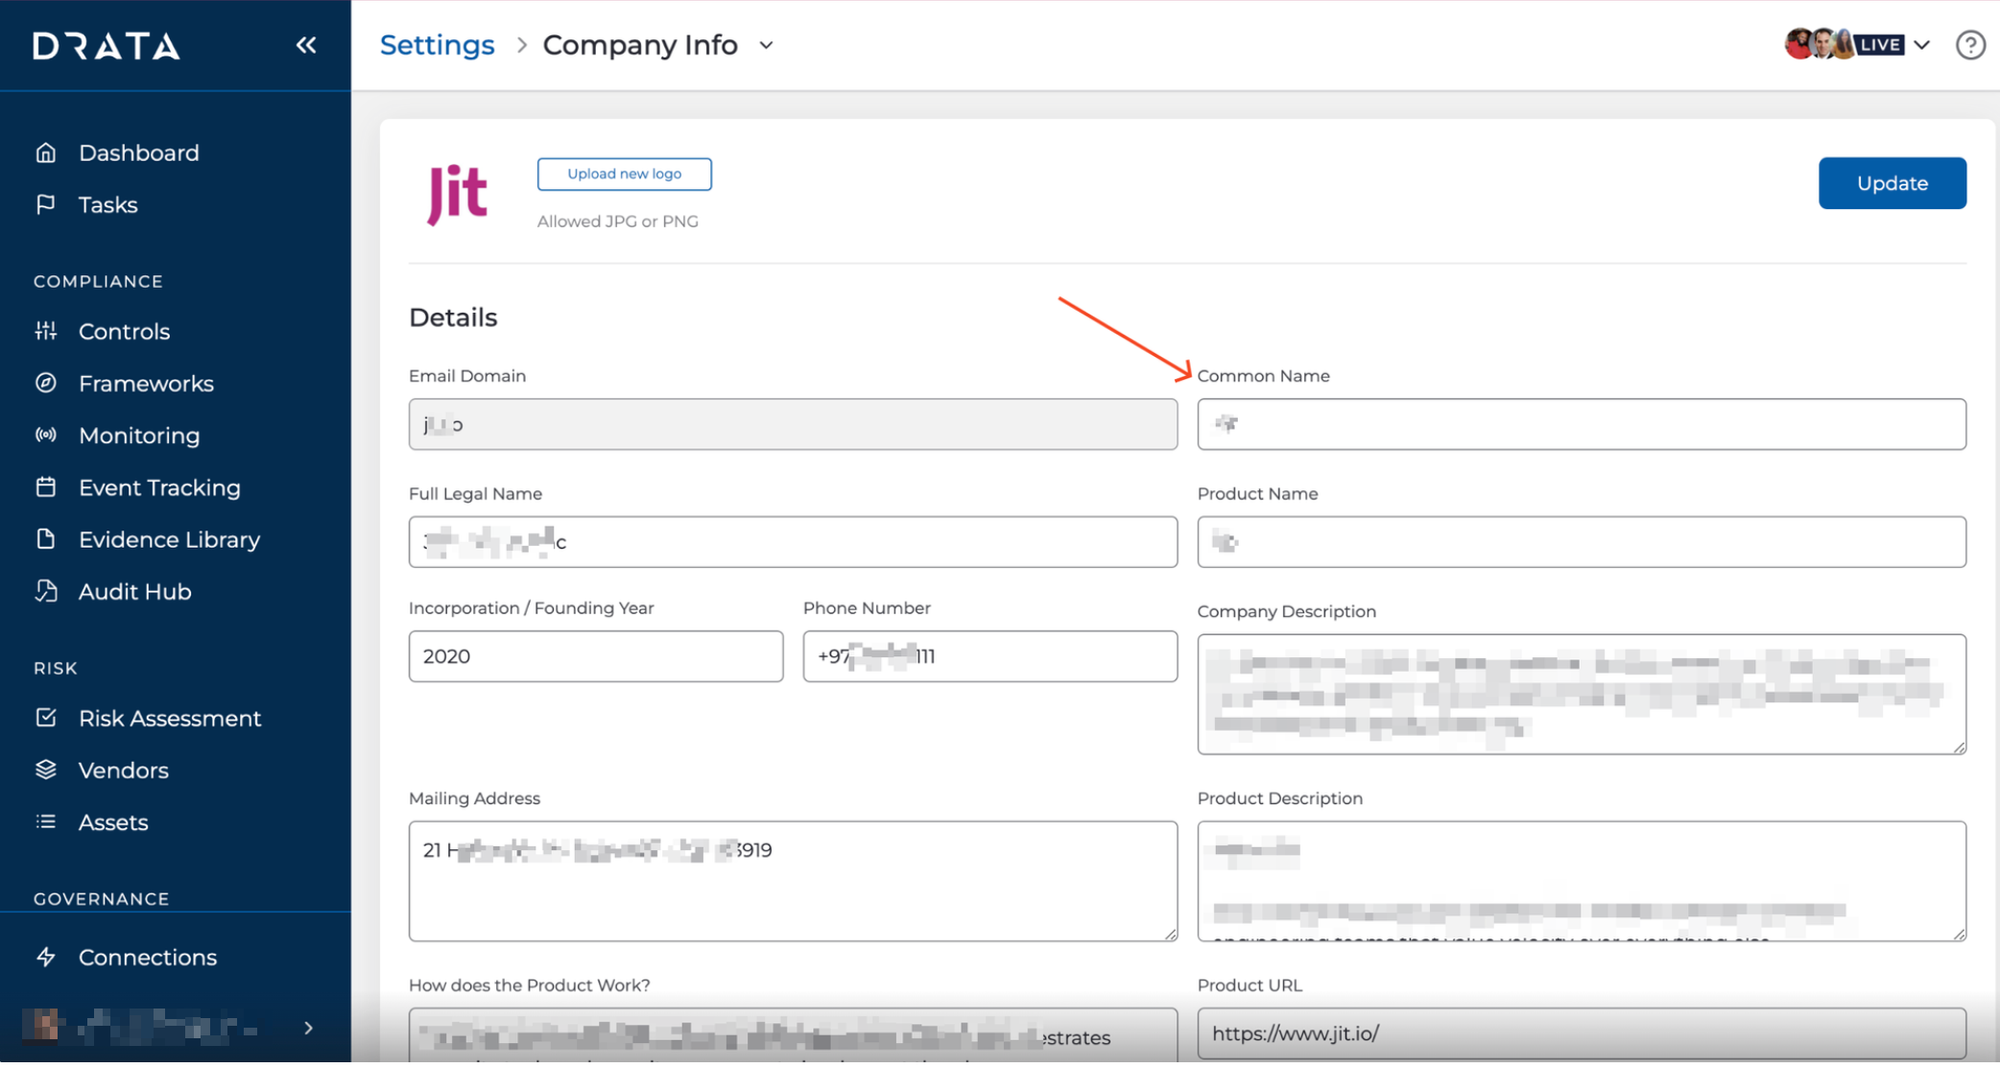
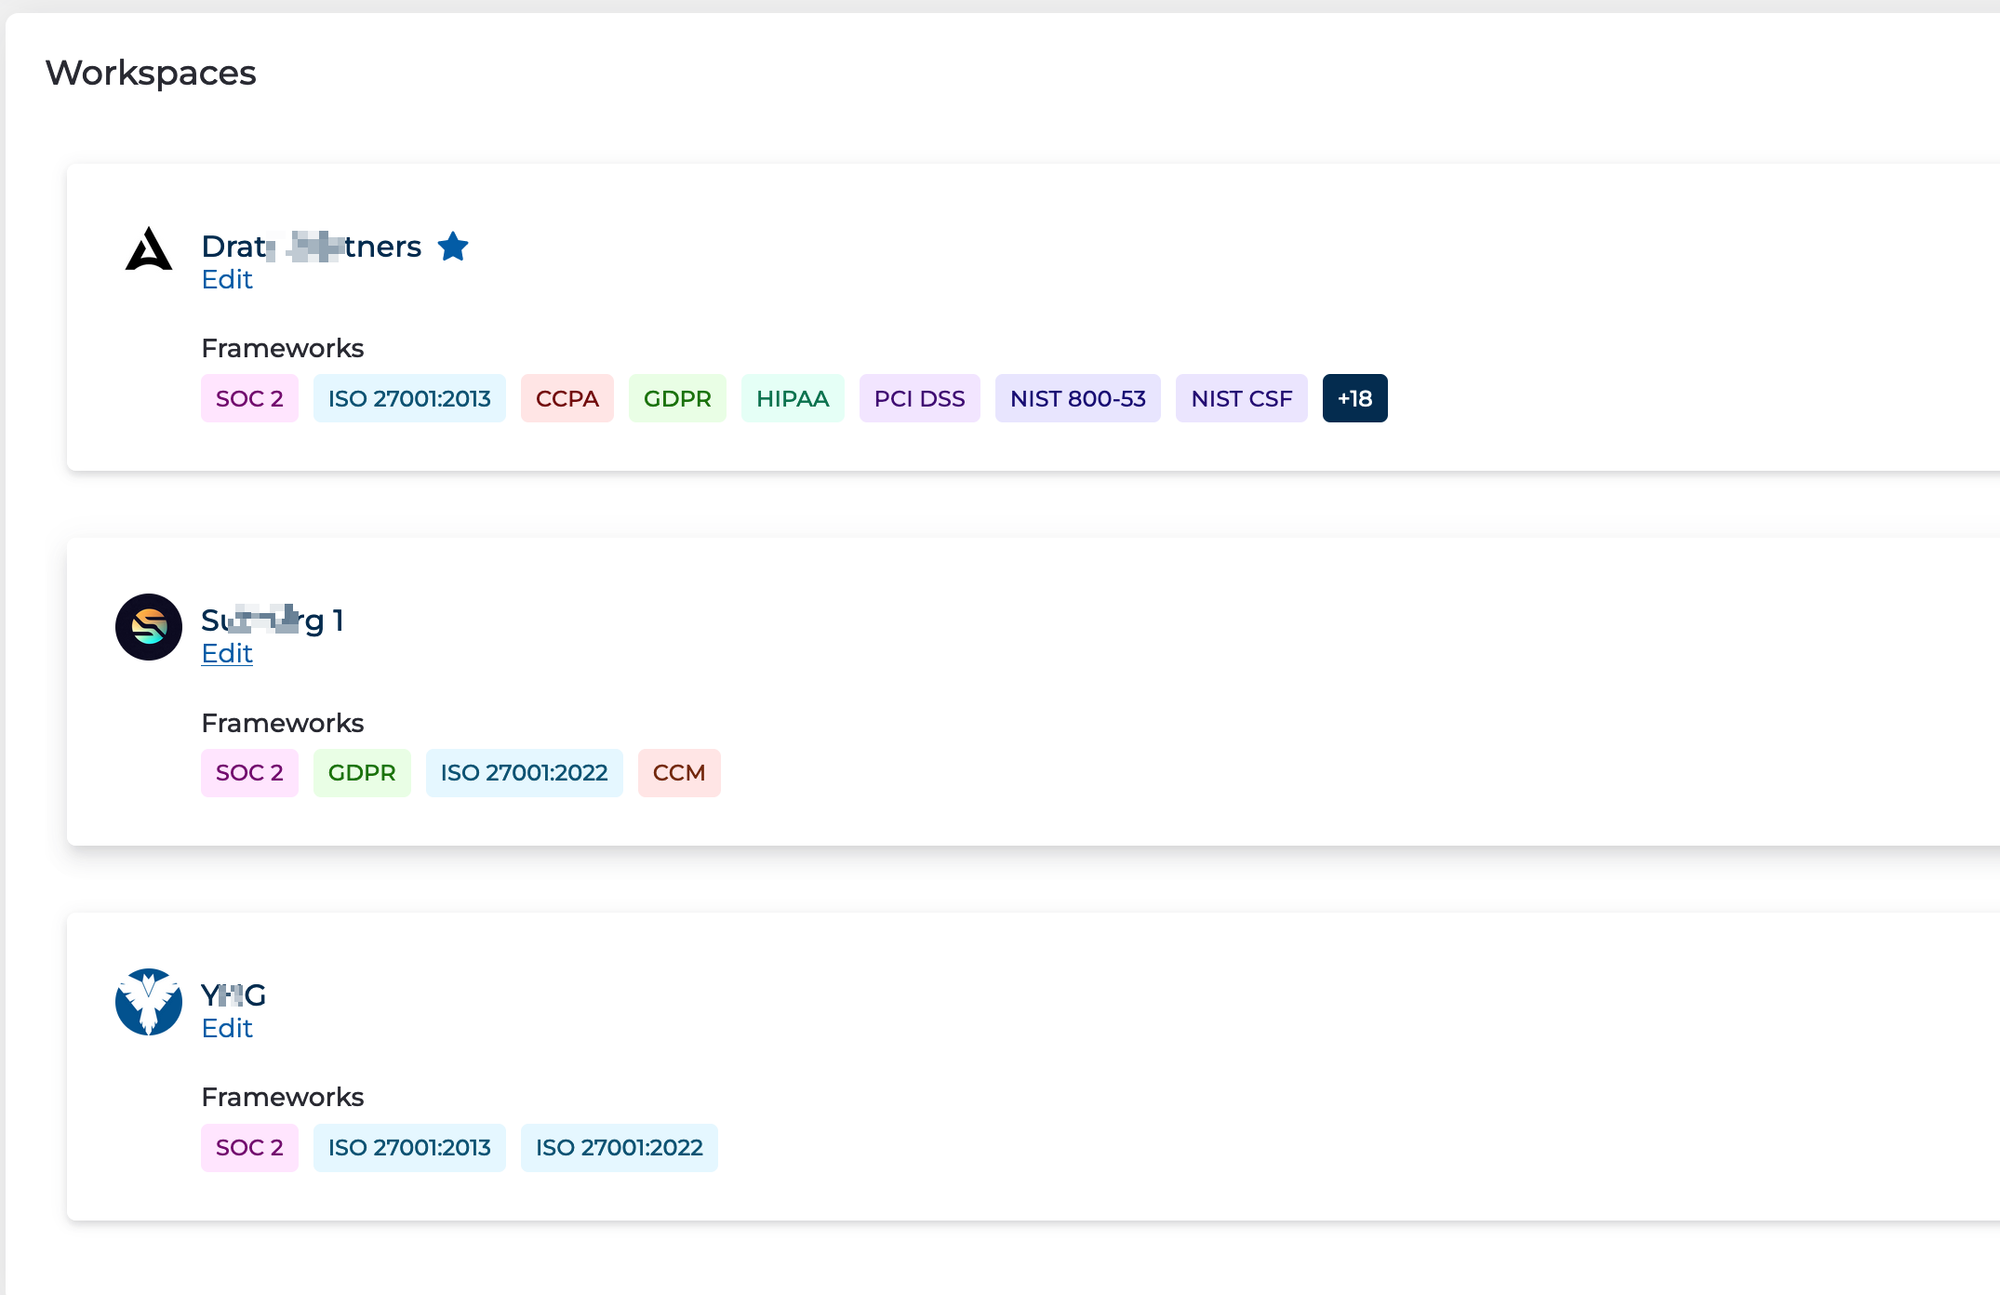
If you have workspaces enabled, Scroll down to Workspaces, and copy the name of the workspace you want to upload evidence to.
-
-
-
We will now periodically send the Jit report to your Drata workspace, according to your SOC2 by Drata plan.
Updated 5 months ago